

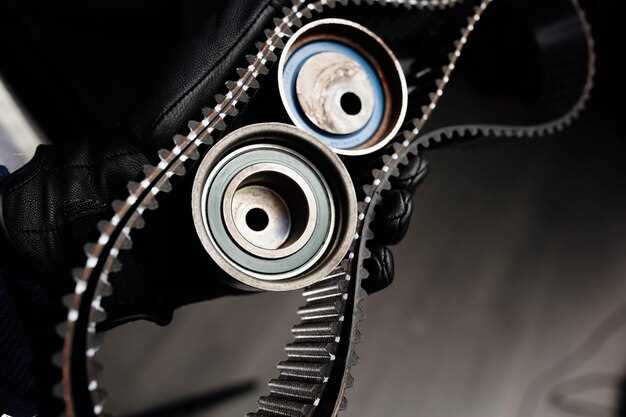
The timing belt is a crucial component in the engine of your Toyota vehicle, playing a vital role in synchronizing the rotation of the crankshaft and camshaft. A properly functioning timing belt ensures that the engine’s valves open and close at the correct times during each cylinder’s intake and exhaust strokes. Therefore, regular replacement of the timing belt is essential for maintaining engine performance and preventing costly damage.
Manufacturers recommend replacing the timing belt at specific intervals, typically between 60,000 to 100,000 miles, but this can vary depending on the model and year of your Toyota. Ignoring this maintenance task can lead to serious issues, including engine misfires, poor fuel efficiency, and in worst-case scenarios, catastrophic engine failure. This guide will provide you with detailed steps on how to assess the condition of your timing belt, recognize the signs of wear, and perform a timely replacement to keep your vehicle running smoothly.
Whether you’re a seasoned mechanic or a novice DIY enthusiast, understanding the timing belt replacement process is essential for any Toyota owner. This guide aims to empower you with the knowledge needed to tackle this important maintenance task, ensuring your vehicle continues to operate at peak efficiency.
Identifying the Right Timing Belt for Your Toyota Model
Choosing the correct timing belt for your Toyota vehicle is crucial for maintaining engine performance and reliability. Each model and engine type may require a specific belt design, so understanding your car’s requirements is essential.
First, refer to your owner’s manual. This document typically contains manufacturer recommendations, including the appropriate part number for the timing belt. It will also provide vital information regarding replacement intervals and maintenance schedules.
Next, consider the engine specifications. Different Toyota models may have various engine types, such as inline four-cylinder, V6, or hybrid systems, each requiring different timing belts. Ensure that the belt you choose matches your engine configuration precisely.
Another important step is to check the VIN (Vehicle Identification Number). This unique code, usually found on the dashboard or inside the driver’s side door, allows you to verify the exact specifications and any required components for your specific vehicle model.
When selecting a timing belt, pay attention to quality. Opt for original equipment manufacturer (OEM) parts when possible, as these are designed specifically for your Toyota. If aftermarket options are considered, ensure they are reputable brands known for their reliability.
Lastly, consult with a trusted mechanic or parts specialist. They can provide insights on compatibility and help you select the right timing belt based on their experience and knowledge of Toyota vehicles. This collaboration ensures that your timing belt replacement is both effective and long-lasting.
Step-by-Step Instructions for Timing Belt Installation
1. Begin by gathering all necessary tools and parts, including the new timing belt, tensioner, and any additional components required for the specific Toyota model.
2. Ensure the engine is cold and then disconnect the negative battery terminal to prevent any electrical issues during the installation process.
3. Remove any components that obstruct access to the timing belt cover, such as the drive belts, radiator, and other parts as needed, depending on the vehicle model.
4. Carefully remove the timing belt cover to expose the timing belt. Make sure to note the position of the old belt and any timing marks on the pulleys.
5. Rotate the crankshaft using a socket to align the timing marks on the crankshaft and camshaft pulleys. This ensures that the engine is set to Top Dead Center (TDC) before belt removal.
6. Once the timing marks are aligned, loosen the tensioner and remove the old timing belt from the pulleys. Inspect the pulleys and adjacent components for wear or damage during this phase.
7. Install the new timing belt over the pulleys, ensuring it is positioned correctly according to the timing marks. Maintain tension on the belt while securing it in place.
8. Reinstall the tensioner, ensuring that it provides the proper tension on the new belt. Check the tension by pressing on the belt and making sure it does not flex excessively.
9. Reassemble any components removed earlier, such as the timing belt cover, drive belts, and radiator. Make sure all fasteners are tightened to manufacturer specifications.
10. Finally, reconnect the negative battery terminal and start the engine to test the installation. Listen for any unusual sounds and check for proper operation, indicating successful replacement of the timing belt.
Common Mistakes to Avoid During Timing Belt Replacement
Replacing a timing belt is a critical maintenance task for Toyota vehicles that requires careful attention to detail. One of the most common mistakes is neglecting to refer to the manufacturer’s specifications. Each model may have specific requirements regarding tension, alignment, and timing marks that must be followed precisely to avoid future engine damage.
Another frequent error is failing to replace the water pump and other associated components during the timing belt replacement. Since the labor involved is similar, ignoring these parts can lead to premature failure and additional costs down the line.
Incorrect tensioning of the new belt is a serious mistake. An over-tightened belt can cause excessive wear on pulleys and bearings, while a loose belt may lead to slippage and timing issues. Always double-check the tension using the specified procedure to ensure optimal performance.
Using an inappropriate replacement belt is also a significant issue. It’s essential to choose a high-quality replacement that meets Toyota’s standards. Cheap or incompatible belts can lead to faster degradation and potential engine failure.
Lastly, neglecting to check other components in the timing system, such as pulleys and tensioners, can result in more problems. Replace or inspect these parts thoroughly as they often work in harmony with the belt. Addressing them now can prevent unexpected breakdowns and extend the longevity of your engine.